

 |
| My post on this submission is HERE. |
Friday, July 8, 2011
My First Win at Stuck?! Sketches!
My Lil' Angel layout won the June challenge on Stuck?! It's my first win and feature! So excited! Thank you Stuck?! Didn't quite expect it as there were so many amazing entires from so many talented scrappers. Here is the winning layout...
Thanks for visiting and sharing my joy! :)


Wednesday, July 6, 2011
Scrappin Studio's Sunday Sketch
This is rather late but I've got a layout here playing along with SS Sunday Sketch using Studio Calico's June Kit; Paper Moon.
Thanks for visiting! Have a lovely scrappy day!
 |
| A shot of my 2 babies; one real baby and one BIG 'baby' hehe; taken at Lucas first trip to PD in June. All are Studio Calico's June kit except the Prima flowers, buttons, ricrac and twine. Also,Tiny black alphas are MM and the "TODAY" & "FAMILY" tags are from MME Life Stories, "Say Cheese" sticker is from MM Stella Rose and tiny chipboard doily trim from Dusty Attic. |
 |
| Sketch by Amelia on Scrappin Studio's blog. |
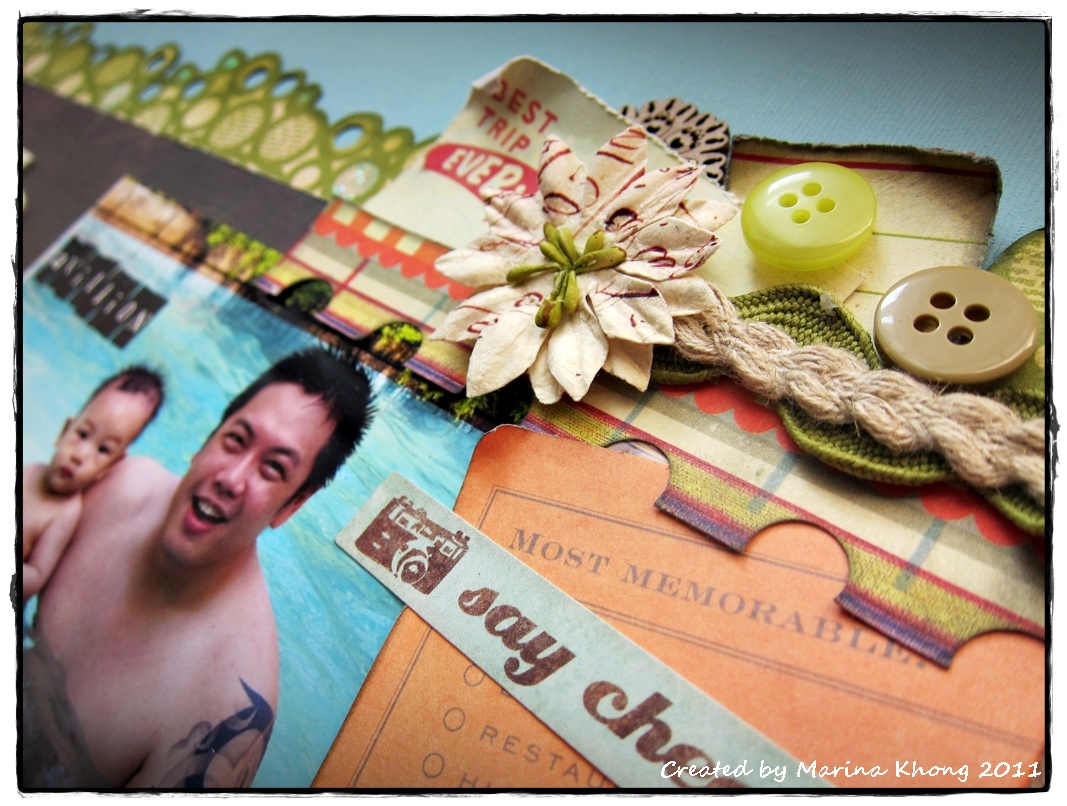 |
| A close-up of the top corner. |
 |
| Another close-up. |
 |
| Journaling on the cute Smash Journal notepad. |
Thanks for visiting! Have a lovely scrappy day!
Tuesday, July 5, 2011
CardPatterns July Sketch 122 Challenge
When I saw July's sketch on CardPatterns I can't wait to play along. It's a simple sketch that has so many possibilities. I decided to make good some of my lovely BB Gabrielle scraps. Here's the sketch:
Here's my interpretation, staying true to the format of a vertical long card:
Materials used:
| July Sketch |
 |
| Rather whimsical I think :) |
 |
| Love love love the 'LOVE WISH DREAM' Tim Holtz Idealogy rubber stamp. |
 |
| Another angle of the card sentiment. |
 |
| This part is accented with punched edges, brown grossgarin ribbon and a vintage crochet lace ribbon. The vintage Prima flower is punched up with a coral pearl centre. |
 |
| Fussy cutting the Gabrielle papers. The BG chip stickers matches them perfectly! |
 |
| I always believe that the inside of a card should always be decorated somewhat as that's where the personal message comes in. |
Materials used:
- Bo Bunny Gabrielle patterned papers
- MME Life Stories paper (craft paper base)
- Tim Holtz Idealogy stamp & Versacolor pigment ink pad in Brown #54
- TH Distress Ink Pad in Pumice (edges) & Tattered Rose (stamped image inside card)
- Basic Grey Curio Chip Stickers
- Prima vintage blooms & pearls
- Brown grossgrain ribbon & beige lace crochet trims
Friday, July 1, 2011
I Was a Bridesmaid!
At any wedding, next to the bride, bridesmaids get all the attention! I had the wonderful oppurtunity to be a bridesmaid at my childhood bestie Jenny's wedding back in '07. We've known each other since we were like SEVEN! It was a beautiful garden wedding and we girls had matching lilac bubble dresses, gorgeous bouquets and professionally done hair and makeup, courtesy of the beautiful bride. Truly an occasion to remember and cherish forever! Here's a scrap of this very memorable celebration. Alas, the bride is not in this photo as this was taken when we were preparing to walk down the aisle :(
I really enjoyed creating this because I get to go all super girly and flowery all the way without worrying about going OTT! Thanks for visiting! Have a lovely weekend ahead!
 |
| A lilac and yellow themed layout. I used mainly prima flowers here and a huge Hambly doiley transparency which I fussy-cut. The only patterned paper here is a Prima Sparkling Spring 6x6 paper pad used a photo mat. (PS: I'm the one on the far right heehee) |
 |
| Prima flowers & pearls, liquid glue, peaarl string, Basic Grey Sweet Threads chip stickers, satin lilac ribbon; all overlaid on top of a fussy-cut Hambly doily transparency, |
 |
| Love the Dusty Attic chipboard trim (underneath the flowers). Lace under the circular yellow shape is from Momoyo. Lotsa Sticklers glitter glue in Icicles. Buter flies are MS Royal Butterfly Punch. |
 |
| Some Pink Paislee's Artisan resin elements here, misted in TA Glimmer Mist in Daisy Yellow. Tiny alphas are Glitz. Fancy chipboard trim from Dusty Attic. |
I really enjoyed creating this because I get to go all super girly and flowery all the way without worrying about going OTT! Thanks for visiting! Have a lovely weekend ahead!
Thursday, June 30, 2011
Stuck?! Challenge 15 June
It's so great how the sketches on Stuck?! are always so inspiring. Here's my interpretation of the June 15 sketch.
![]()
Thank you for visiting! Have a nice day ahead!
The June 15 Sketch on Stuck?! |
 |
| An old photo taken at the zoo with my brother, cousins and god sister way back in '87. We used to do everything together the bunch of us :) Using Crate Paper's Little Sprout collection here. |

 |
| Misted with SC Mister Huey's Warm Calico and some MM Acrylic Paint in Manila. |
Tuesday, June 28, 2011
The Color Room Challenge #64
Here's my layout for TCR challenger #64. The colors in this palette are really pretty and sweet (almost too girly!) and it would be a challenge to scrap a layout for a boy instead of a girl. So here's my take on it, trying hard not to make it too girly so I avoided flowers and butterflies this round.
Materials used:
| TCR Palette #64 |
 |
| Yummy Thumb! My lil thumb sucking boy at around 5 months old. |
 |
| Craft tag stamped and decorated with Crate Paper's Toy Box Stickers. Fan flowers are handmade. |
 |
| Loving these cotton border trims which I bought from a knit shop! |
 |
 |
| Handmade flaglines :) |
Materials used:
- Patterned papers from Crate Paper Toy Box (yellow), Simple Stories 100 Days of Summer (red) & Pink Paislee's Daily Junque (pink)
- Baby blue cardstock
- Tag ("Remarkable" & "Unique") from MME's Stella Rose, 5" manila tag is Ranger.
- Border stickers from Crate Paper Toy Box
- Paper Artsy Numbers Stamp
- MM Baby Enamel Metal Tiles
- AC Pigment Ink Pad in Rouge & TH Distress Ink Pad in Aged Mahagony
- Liquid Pearls in Baby Blue
- Pink velvet trim bought from Papier, yellow and blue cotton trims from Lily Handicraft in Subang Parade.
- Alphas are Pink Paislee's Sweetness (yellow). October Afternoon & Jenny Bowlin's mini alphas.
- Random buttons and yellow thread
Saturday, June 25, 2011
No Patterned Papers!
I'm exceptionally proud of this page because I did not use a single printed patterned paper! I wanted to take my mists and stamps to the limit and challenge myself if I could come up with something decent without a single piece of store-bought patterned paper.
Materials used:
Basic how-to:
 |
| Hubby caught Lucas starring out the window with such intense concentration one rainy weekend afternoon. He shot this without Lucas realising it at all. Just shows how deep in thought he was at that point. Adorable! This page was fun and challenging to create! I basically created my own 'patterned papers' using inks and stamps and scrunched-up paper. |
 |
| Close up of the rather long title. |
 |
| Close up of my home-made twine badges! |
 |
| Handwritten phrase a little bit crooked, no thanks to lazy eye-balling rather than drawing some grid lines. |
- Studio Calico cloud clear stamps
- Paper Artsy numbers cling stamp
- Cardstock; craft cardstock for base, yellow and navy cardstock for accents
- Plain white paper: I used the white paper that came with my scrapbook album, no waste!
- Cotton twine; for hand-stitched border, accents and twine badges (bought from MPH)
- TH Distress Ink Pads: Broken China and Stormy Sky (for stamping and distressing)
- Tattered Angels Turquoise Blue and Artic Blue Glimmer Mist (for the homemade 'patterned papers')
- Studio Calico's Mister Huey's Mist inWarm Calico (for background on the craft cardstock)
- Prima flowers and pearls
- Random buttons
- EK Success scallop border punch
- Alphas: AC and MM
 |
| The three hand-made 'patterned papers'. |
- To make the paper on the left, scrunch up the white paper. Mist with TA Turquoise Blue Glimmer Mist. Allow to dry completely, then lightly brush with TH Distress Ink in Stormy Sky all over the surface and the edges. (used Inksentials ink blender tool) Lastly, sprinkle some TA Artic Blue (unscrew the bottle and lightly tap the nozzle)
- To make the paper on the right, stamp on clean white paper. Once the ink is dried, scrunched it up abit and mist lightly with TA Turquoise Blue (not too wet or the stamped images may smear). Then lightly brush with TH Distress Ink in Stormy Sky all over the surface and the edges. (used Inksentials ink blender tool)
- The last bit is really easy, just stamp, stamp and stamp and distress the edges using Making Memories edge scrapper tool.
- To make twine badges, cut up circles of the sizes you like, then smear with liquid adhesive (best to use Tombow Mono Multi as it works wet or dry and gives you room to wiggle). Let the adhesive dry (turns from white to transparent once dried). Roll the twine into a flat disc with your fingers, when halfway through, place it on the circle with the adhesive. Continue rolling till you cover the entire circle. Use abit more glue to seal the end bit. Decorate the centres with buttons, brads or whatever.
Subscribe to:
Posts (Atom)





 Posts